
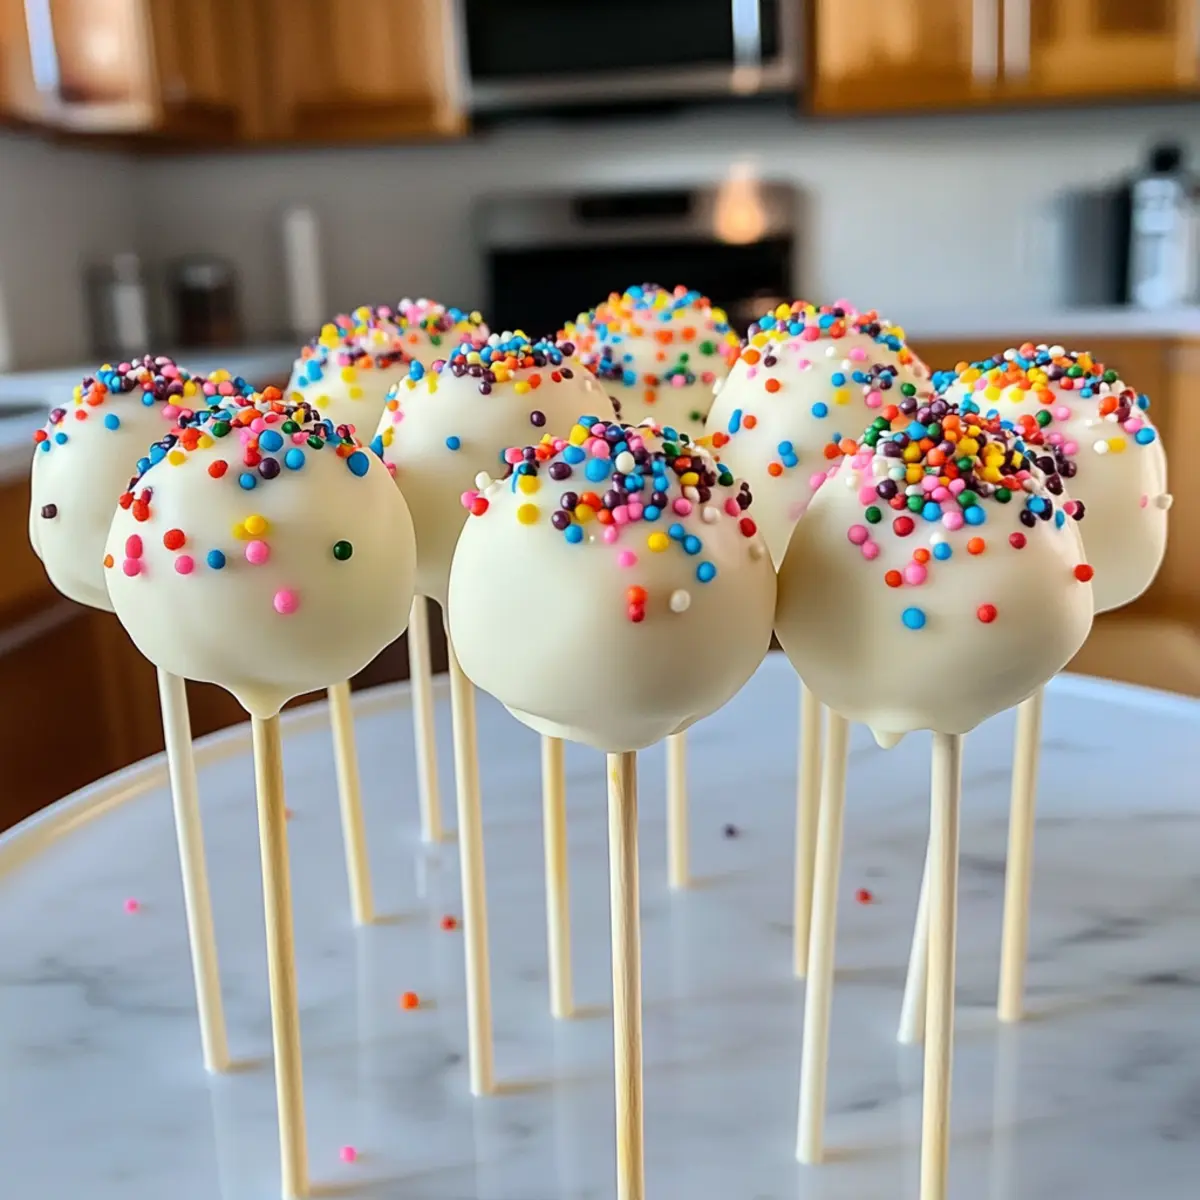
Bite-sized treats hold a special place in our hearts, and nothing captivates like Irresistible Easy Cake Pops! With their charming colors and decadent sweetness, these delightful little spheres embody joy in every single nibble. I remember the first time I made these with my niece during a rainy afternoon; the kitchen was filled with laughter and the sweet aroma of melting chocolate.
Perfect for parties, simple family gatherings, or just as a fun afternoon activity, cake pops are incredibly versatile. Whether you choose a classic chocolate cake mix or explore adventurous flavors like lemon or red velvet, the possibilities are endless! Plus, these pops can be customized with various toppings, turning your desserts into eye-catching masterpieces.
What’s more, this recipe is designed to keep things stress-free, letting you whip up a batch with minimal hassle—perfect for those who want homemade goodness without hours in the kitchen. So, roll up your sleeves, and let’s dive into the delightful world of cake pops that are sure to impress family and friends alike!
Why You’ll Love Irresistible Easy Cake Pops?
Unforgettable Memories: Imagine creating sweet moments with loved ones as you craft these tasty treats together!
Limitless Customization: Choose any cake mix flavor and mix in your favorite frostings and toppings for a personal twist.
Quick Preparation: This no-fuss recipe allows you to have delicious cake pops ready in no time.
Perfect for Any Occasion: Whether celebrating a birthday or simply enjoying a family movie night, these treats fit right in.
Fun Family Activity: Get everyone involved, from kids to grandparents, and make it a delicious bonding experience.
Dive into this sweet project, and if you’re in the mood for more delectable desserts, be sure to check out the Decadent Pear Cake to satisfy your sweet cravings!
Irresistible Easy Cake Pops Ingredients
These Irresistible Easy Cake Pops can be made with simple ingredients that pack a flavor punch!
For the Cake Pops
- Cake Mix – Use your favorite flavor (chocolate, vanilla, red velvet) for a personalized touch.
- Eggs – 3 large eggs for optimal moisture and structure in your cake.
- Vegetable Oil – 1/2 cup to ensure a moist, tender crumb.
For the Frosting Mixture
- Frosting – 1 cup is essential for binding the crumbled cake into a moldable mixture; use store-bought or homemade.
For Dipping
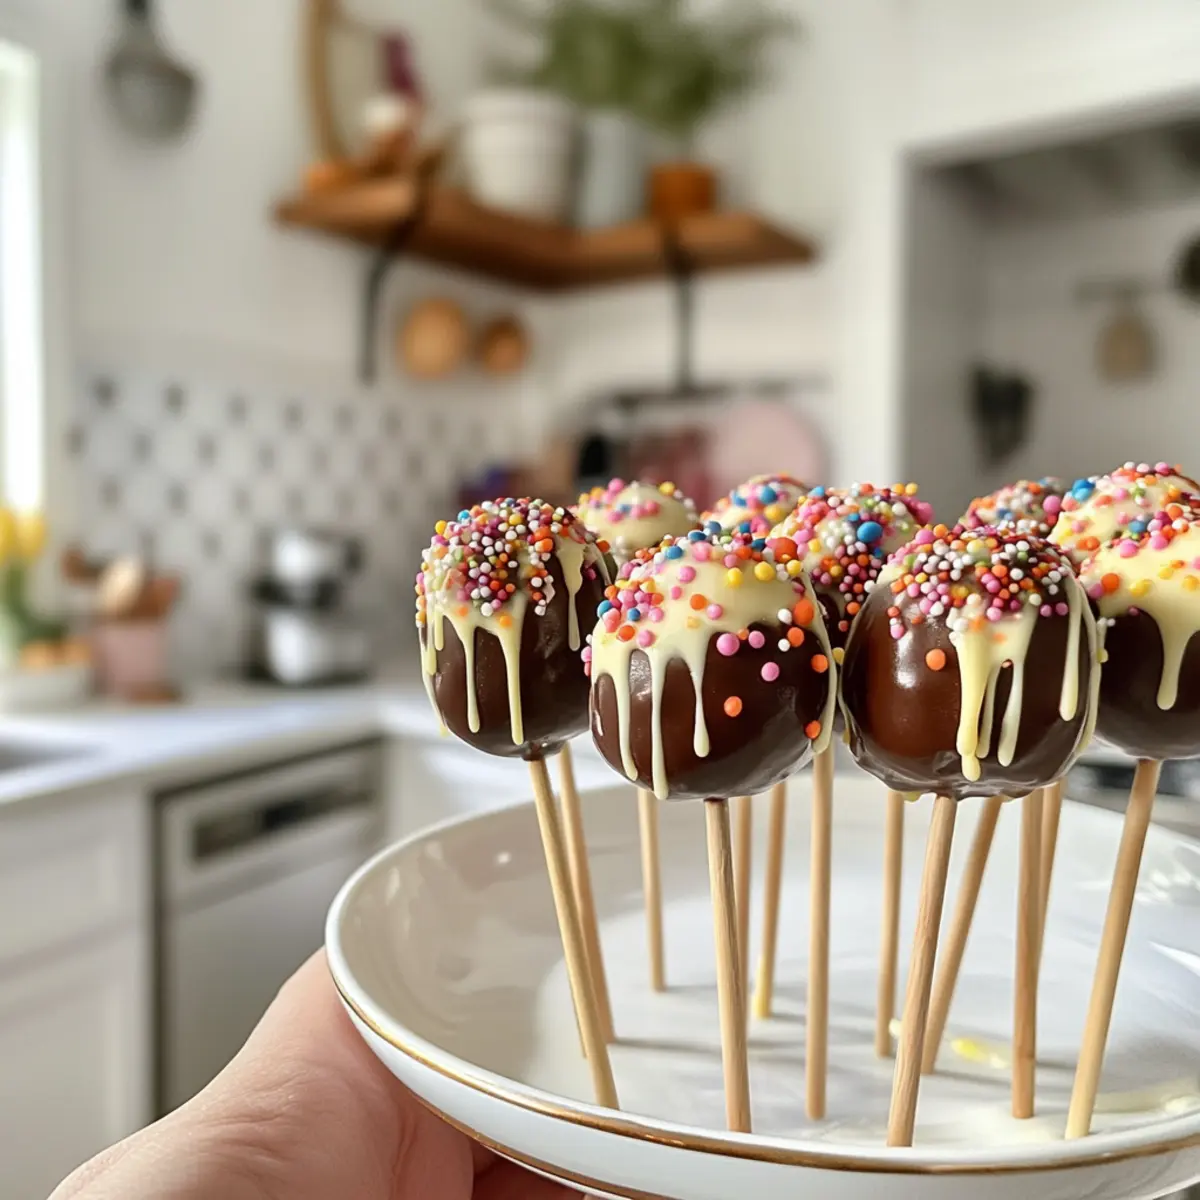
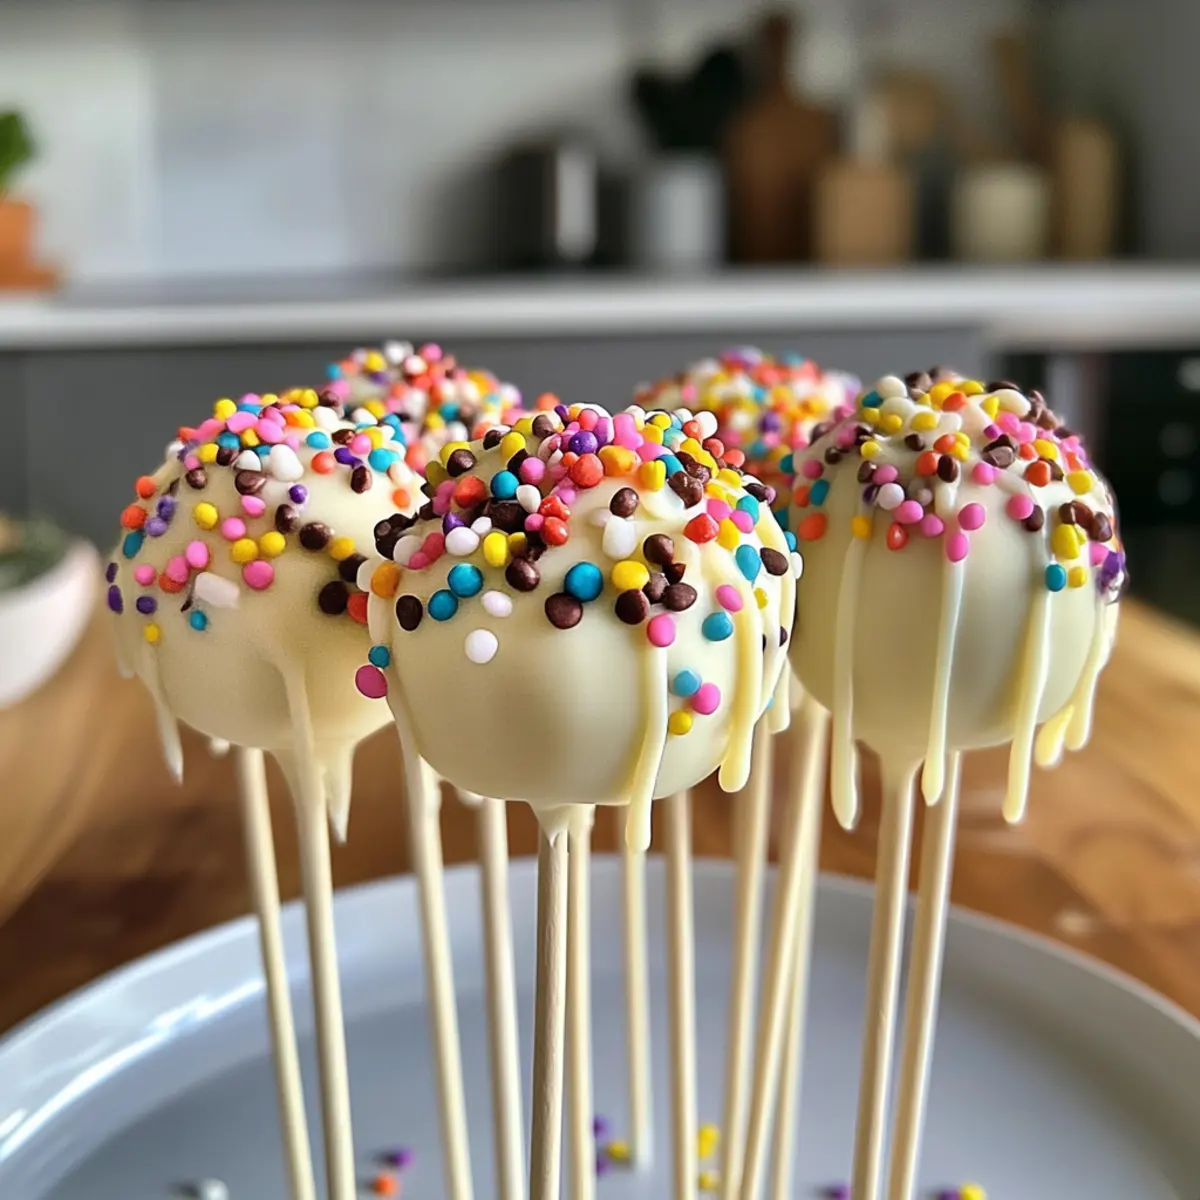
- Dipping Chocolate – Choose between melting chocolate or colorful candy melts for a delightful coating.
- Lollipop Sticks – Essential for holding the cake pops upright and ensuring easy handling.
For Decoration
- Sprinkles or Toppings – Explore options like rainbow sprinkles, crushed nuts, or coconut flakes to create visually appealing designs.
Gather these ingredients, and you’ll be all set to embark on your delicious cake pop adventure!
How to Make Irresistible Easy Cake Pops
-
Bake the Cake: Preheat your oven to 350°F (175°C). Prepare a greased pan, mix your cake according to the package instructions, pour it into the pan, and bake for 25-30 minutes until golden brown.
-
Cool Down: Once baked, allow the cake to cool in the pan for 1 hour. Afterward, gently transfer it to a wire rack to cool completely.
-
Crumble It Up: Once your cake is cool, crumble it into fine pieces in a large bowl. This will create the base for your cake pops.
-
Add Frosting: Pour in 1 cup of frosting to the cake crumbs and mix until evenly combined, ensuring it is moldable and sticky.
-
Shape Your Pops: Take the mixture and roll it into 1-inch balls. Place them onto a lined baking sheet and refrigerate for 1 hour to firm up.
-
Dip and Decorate: Melt your dipping chocolate. Dip one end of each lollipop stick into the chocolate, then insert it halfway into each cake ball. Dip the entire cake ball into the melted chocolate and decorate with your choice of toppings before letting them set on the lined sheet.
Optional: Add a drizzle of contrasting chocolate over the top for a fun finishing touch.
Exact quantities are listed in the recipe card below.
Storage Tips for Irresistible Easy Cake Pops
Room Temperature: Keep your cake pops in an airtight container at room temperature for up to 3 days to maintain freshness.
Fridge: For extended enjoyment, refrigerate them in a sealed container for up to a week. This helps keep the cake moist and the chocolate coating firm.
Freezer: Want to save some for later? Freeze your cake pops for up to 3 months. Just ensure they are well-wrapped or stored in an airtight container to prevent freezer burn.
Reheating: If refrigerated or frozen, remove from the fridge or freezer, let sit at room temperature for a few minutes before serving, allowing the chocolate to soften slightly for the best taste experience.
Expert Tips for Irresistible Easy Cake Pops
- Cool First: Make sure your cake is completely cooled before crumbling; this prevents a soggy mixture that won’t hold shape.
- Frosting Choice: Opt for a frosting flavor that complements your cake; chocolate frosting with chocolate cake creates an indulgent treat!
- Stabilize Sticks: For better stability, dip the lollipop sticks in melted chocolate before inserting them into the cake pops.
- Even Size Matters: Roll each cake ball uniformly; consistent sizes ensure even coating and setting for your irresistible easy cake pops.
- Chill Before Dipping: Refrigerate the cake balls for at least 1 hour; this helps them hold their shape while being coated in chocolate.
What to Serve with Irresistible Easy Cake Pops?
Delightful cake pops call for equally enchanting accompaniments to create a full and joyous meal experience.
- Fruity Punch: A refreshing fruit punch enhances the celebratory vibe, offering a sweet contrast to the rich chocolate.
- Creamy Vanilla Ice Cream: Serve alongside a scoop of vanilla ice cream for a dreamy combination that melts in your mouth.
- Chocolate Fondue: Dip your cake pops into a warm chocolate fondue for an extra layer of sweetness and fun!
- Colorful Fruit Salad: Brighten your table with a vibrant fruit salad, balancing the richness of the cake pops with freshness.
- Coffee or Espresso: A warm cup of coffee or espresso adds a sophisticated touch, complementing the sweetness perfectly.
- Milkshakes: Whip up thick milkshakes—chocolate, vanilla, or strawberry—to dip or dunk those cake pops into a deliciously creamy treat.
- Mini Cupcakes: Serve an assortment of mini cupcakes for a delightful dessert platter that satisfies all sweet cravings.
- Cheesecake Bites: These creamy bites will wow your guests and create an appealing treat trio when paired with your cake pops.
- Macarons: These delicate, colorful treats make for stunning presentation and a sophisticated palate cleanser alongside cake pops.
Make Ahead Options
These Irresistible Easy Cake Pops are perfect for busy home cooks looking to save time! You can prepare the cake and crumble it up up to 24 hours in advance, storing it in an airtight container in the fridge to maintain its moisture. Simply mix the crumbled cake with frosting and roll it into balls when you’re ready to proceed. You can also shape the pops and refrigerate them for up to 2 days before dipping, ensuring they hold their shape. Just remember to dip them in melted chocolate and add your favorite toppings before serving, so they remain just as delightful as when freshly made!
Variations & Substitutions for Irresistible Easy Cake Pops
Feel free to unleash your creativity and tailor these delightful treats to your tastebuds!
-
Flavor Swap: Use different cake mixes like lemon, spice, or even funfetti for an exciting flavor twist. The world is your oyster!
-
Frosting Fusion: Opt for cream cheese frosting with red velvet or vanilla frosting with chocolate cake for a delicious pairing that elevates flavor.
-
Nutty Delight: Incorporate ground nuts (almonds, walnuts) into the cake mixture, adding a delightful crunch that contrasts beautifully with the smooth chocolate coating.
-
Fruit Flavors: Fold in crushed fruits, such as strawberries or bananas, into your frosting to infuse additional moisture and fruity goodness into the pops. Yum!
-
Theme Decor: Customize your toppings based on occasion—use pastel sprinkles for baby showers or festive colors for birthdays, ensuring your cake pops are as pleasing to the eyes as they are to the palate.
-
Gluten-Free: Substitute regular cake mix with gluten-free alternatives and a gluten-free frosting to cater to those with dietary restrictions, ensuring everyone can enjoy a sweet bite!
-
Heat Things Up: Add a pinch of chili powder or cayenne to your chocolate coating for a sweet-spicy surprise that will intrigue your taste buds and impress your guests.
-
Vegan Version: Replace eggs with applesauce or flaxseed meal, and use dairy-free chocolate and frosting for a plant-based treat that’s just as delightful.
Let your imagination run wild and mix it up with these variations to create cake pops that are uniquely yours!
Irresistible Easy Cake Pops Recipe FAQs
What type of cake mix is best for cake pops?
Absolutely! You can use any cake mix flavor you love—chocolate, vanilla, or even red velvet works beautifully. Just grab your favorite from the store or whip up a batch from scratch. The flavor you choose will be the foundation of your cake pops, so let your personality shine through!
How should I store my cake pops?
Very good question! Store your cake pops in an airtight container at room temperature for up to 3 days. If you want them to last longer, pop them in the fridge, where they’ll stay fresh for up to a week. For even longer storage, you can freeze them for up to 3 months. Just ensure they are well-wrapped to avoid freezer burn.
Can I freeze cake pops? How do I do it correctly?
Of course! Freezing cake pops is a fantastic way to keep your treats handy for later. Here’s how: First, let the chocolate coating set fully at room temperature. Then place the cake pops in a single layer on a baking sheet and freeze them for about an hour. Once they are firm, transfer them to a freezer-safe bag or container, layering parchment paper between them to prevent sticking. Make sure to label them; they’ll be good for up to 3 months!
What should I do if my cake pop mixture is too dry?
Don’t panic! If your mixture seems a little dry and crumbly, that’s an easy fix. Simply add a bit more frosting, a tablespoon at a time, until the mixture becomes moldable and holds together nicely. You can also use a splash of milk to help bring it all together if you prefer!
Can pets eat cake pops?
Oh, dear! While we all love sharing our treats, it’s best to keep cake pops away from pets. Ingredients like chocolate and certain frostings can be harmful to dogs and cats. If you want to share the fun, consider making a pet-friendly alternative with safe ingredients!
How can I get my cake pops to be perfectly round?
Great question! To achieve perfectly shaped cake pops, make sure to roll the mixture into balls while it is still slightly chilled from the fridge. This will keep the mixture firm. If you find the balls are sticking to your hands, you can lightly dampen your hands with water, which will help you form those flawless spheres with ease!
Enjoy making your Irresistible Easy Cake Pops, and happy baking!

Irresistible Easy Cake Pops: Fun Treats to Sweeten Your Day
Ingredients
Equipment
Method
- Preheat your oven to 350°F (175°C). Prepare a greased pan, mix your cake according to the package instructions, pour it into the pan, and bake for 25-30 minutes until golden brown.
- Once baked, allow the cake to cool in the pan for 1 hour. Afterward, gently transfer it to a wire rack to cool completely.
- Once your cake is cool, crumble it into fine pieces in a large bowl.
- Pour in 1 cup of frosting to the cake crumbs and mix until evenly combined, ensuring it is moldable and sticky.
- Take the mixture and roll it into 1-inch balls. Place them onto a lined baking sheet and refrigerate for 1 hour to firm up.
- Melt your dipping chocolate. Dip one end of each lollipop stick into the chocolate, then insert it halfway into each cake ball. Dip the entire cake ball into the melted chocolate and decorate with your choice of toppings before letting them set on the lined sheet.
Notes


Leave a Comment