
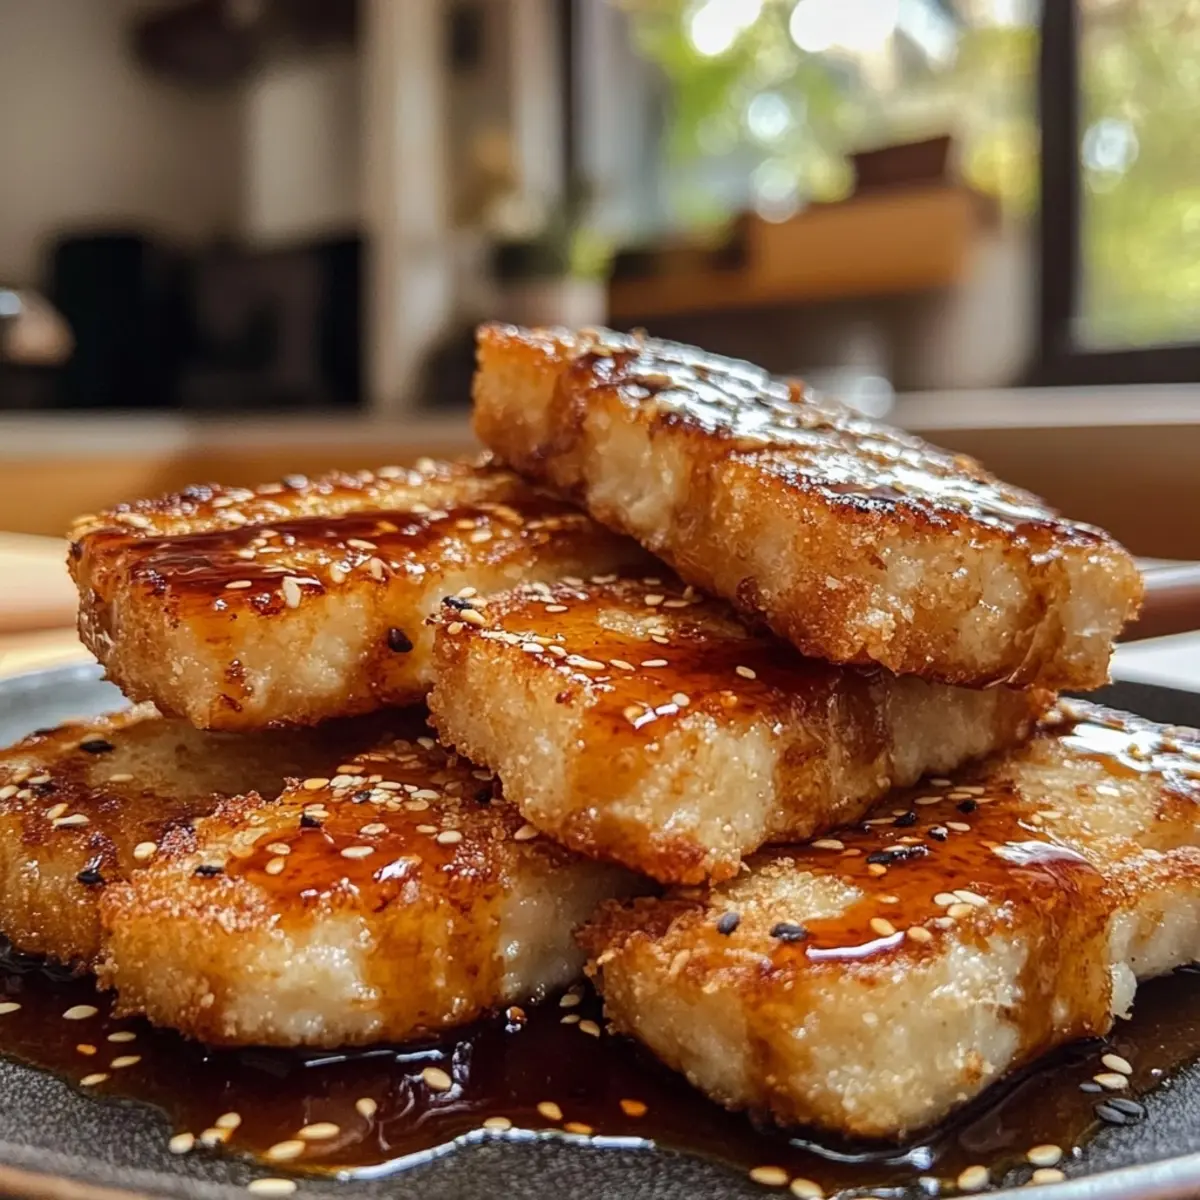
There’s nothing quite like the irresistible crunch of crispy kakiage to lift your spirits and bring joy to your dinner table. As I stood in my kitchen, the sizzle of fresh vegetables meeting hot oil was music to my ears, instantly transporting me to bustling Japanese markets where this delightful dish is a staple. This tradition of mixing seasonal vegetables into a light, airy batter offers endless possibilities. Whether you’re partial to succulent shrimp or prefer to keep it vegetarian, each bite bursts with flavor and texture.
After a long week of takeout meals, I knew it was time for something homemade and wholesome. In under an hour, you can whip up this golden delight, tailor it to your family’s tastes, and create an unforgettable dining experience. With simple ingredients and customizable options, this crispy authentic kakiage is not just easy to make; it’s a celebration of all the vibrant flavors that nature has to offer. Grab your apron, and let’s dive into this fun and flavorful journey!
Why Love Crispy Authentic Kakiage?
Irresistible Crunch: Each bite delivers a delightful crunch that’s hard to resist.
Quick Preparation: Ready in under an hour, making it perfect for weeknight dinners.
Customizable Options: Tailor it to your taste with various vegetables or switch shrimp for calamari.
Nutrient-Rich: Packed with fresh veggies, it’s a wholesome alternative to typical takeout options.
Cultural Experience: Enjoy a taste of Japan right in your kitchen, bringing a bit of culinary adventure to your dining table.
Serve It Fresh: Pair it with sea salt or tsuyu sauce for an added flavor boost—your family will thank you!
Crispy Authentic Kakiage Ingredients
For the Batter
• Cake Flour – Provides a delicate texture for frying; substitute with all-purpose flour for a different finish.
• Cornstarch – Enhances the crispness of the batter, ensuring your kakiage comes out irresistibly crunchy.
• Egg – Acts as a binding agent for the batter, helping to hold everything together beautifully.
• Chilled Water – Adds moisture for a crispy texture; use sparkling water for a lighter, fluffier batter.
• Ice Cubes – Keeps the batter cool to ensure maximum crispiness while frying.
For the Vegetables
• Onions – Adds a sweet flavor and a tender bite; choose thin slices for even cooking.
• Carrots – Julienne or cut into thin strips to blend seamlessly in the batter.
• Shrimp (optional) – For those who enjoy a surf and turf twist; feel free to substitute with calamari if desired.
• Green Beans – Halved for even frying; you can substitute or add seasonal vegetables like zucchini or sweet potato.
For Serving
• Sea Salt – Enhances flavor when served, giving your kakiage that delicious finishing touch.
• Tsuyu Sauce – A perfect dipping sauce; alternatively, use soy sauce for a rich, savory flavor.
With these ingredients in hand, you’re just a few steps away from crafting your very own crispy authentic kakiage, a delightful dish that marries flavor, texture, and a touch of cultural flair!
How to Make Crispy Authentic Kakiage
- Chill the Ingredients: Start by combining your cake flour and cornstarch in a bowl, then place it in the freezer for about 30 minutes. This step ensures a lighter, crispier batter!
- Prepare the Vegetables: While the flour chills, take your sliced onions, julienned carrots, halved green beans, and optional shrimp. Pat them dry with a paper towel, then lightly sprinkle them with cake flour to help the batter stick.
- Heat Oil: In a deep frying pan or wok, preheat your oil to 180°C (356°F). Test the oil’s readiness by dropping a tiny spoonful of batter in; it should sizzle upon contact.
- Whisk Batter: In a separate bowl, whisk together the egg, chilled water, and carbonated water until well blended. This bubbling liquid is key for a fluffy finish!
- Combine Dry Ingredients: Gradually sift the chilled cake flour and cornstarch into the egg mixture. Gently fold until combined—be careful not to overmix; a few lumps are okay!
- Incorporate Vegetables: Toss the ice cubes into the batter, then pour this mixture over your prepared vegetables. Gently mix to coat them evenly without breaking the veggies.
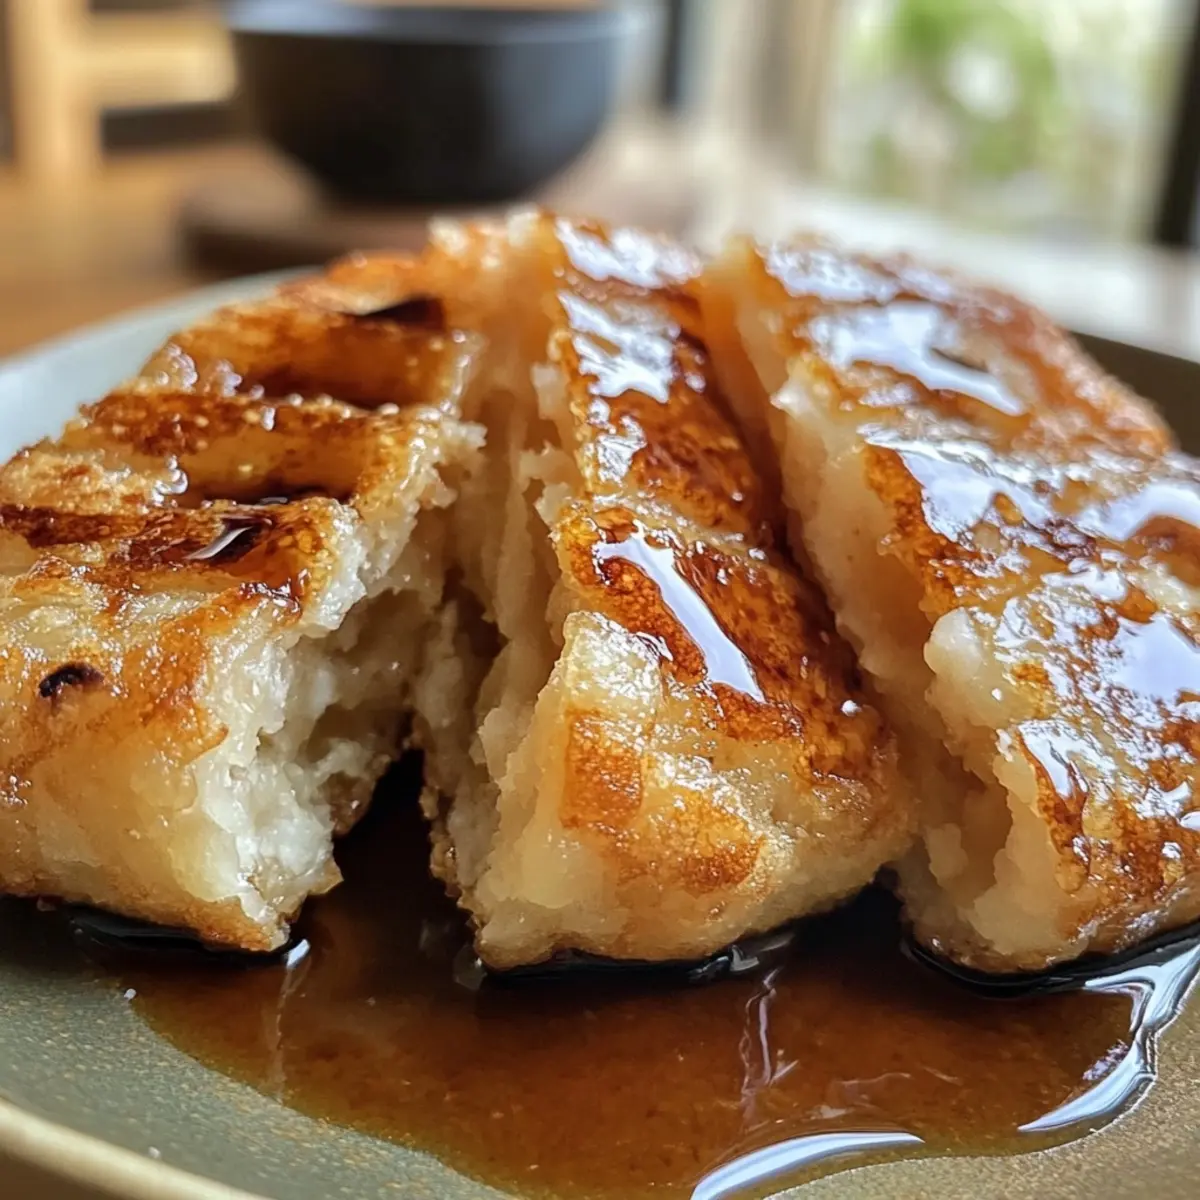
- Fry: Carefully scoop and drop spoonfuls of the mixture into the hot oil, frying until golden brown and crispy, about 1 minute and 30 seconds per side. Enjoy the enticing aroma!
- Drain: Using a slotted spoon, transfer your kakiage to a wire rack to let excess oil drain. This keeps them crunchy and avoids sogginess.
- Serve: Plate your crispy kakiage while hot, alongside a sprinkle of sea salt or a small bowl of tsuyu sauce for dipping. Enjoy the delightful flavors!
Optional: Serve with a sprinkle of sesame seeds for added crunch and flavor.
Exact quantities are listed in the recipe card below.
What to Serve with Crispy Authentic Kakiage?
Elevate your meal experience by pairing this delightful Japanese tempura with complementary dishes that amplify its delicious flavors.
- Steamed Jasmine Rice: A fluffy bed of jasmine rice absorbs the savory tsuyu sauce beautifully, offering a light yet fulfilling balance.
- Miso Soup: This warm and comforting soup adds umami depth, making for a soothing start to your meal. Pairing it with kakiage brings a taste of Japan home.
- Cucumber Salad: A refreshing cucumber salad tossed in rice vinegar adds a crisp crunch and tangy undertone, rejuvenating your taste buds between bites.
- Sautéed Greens: Lightly sautéed bok choy or spinach offers a nutritious contrast, enriching your plate with vibrant colors and textures.
- Pickled Vegetables: Sweet and tangy pickles provide a delightful contrast that cuts through the richness of the fried kakiage, adding a pop of flavor.
- Cold Soba Noodles: Serve chilled soba noodles with a soy dipping sauce for a light side that pairs perfectly with the kakiage, making each bite feel like a gourmet experience.
- Japanese Beer: For a relaxing drink option, a crisp, refreshing Japanese beer cleanses the palate and complements the rich flavors of your kakiage.
- Green Tea Ice Cream: For dessert, a scoop of creamy green tea ice cream is a sweet yet subtle way to finish your meal, leaving everyone feeling satisfied.
Embrace the array of flavors this menu offers, and watch your dinner table come alive with joy and satisfaction!
Storage Tips for Crispy Authentic Kakiage
- Room Temperature: Enjoy your crispy authentic kakiage within 2 hours for the best flavor and texture.
- Refrigerator: Store cooled kakiage in an airtight container for up to 3 days. To restore its crunchiness, reheat in the oven at 180°C (350°F) for about 10 minutes.
- Freezer: Freeze cooked kakiage pieces on a baking sheet until solid, then transfer to a freezer bag for up to 1 month. Reheat directly from frozen in a preheated oven until heated through and crispy.
Expert Tips for Crispy Authentic Kakiage
- Oil Temperature: Keep the oil at 180°C (356°F) for perfectly fried kakiage. If it’s too cool, the batter will absorb oil and become greasy.
- Don’t Overcrowd: Fry in small batches to maintain the oil temperature, ensuring every piece gets that desired crispy texture without steaming.
- Batter Consistency: If the batter seems too thick, gradually add chilled carbonated water until it reaches a light, flowing consistency that clings to the vegetables.
- Vegetable Variations: Feel free to mix seasonal vegetables for a delightful twist. Carrots and zucchini work beautifully together in your crispy authentic kakiage.
- Make-Ahead: Prep your vegetables up to three days in advance and store them in the refrigerator. This way, your kakiage will come together quickly when you’re ready to cook!
Variations & Substitutions for Crispy Authentic Kakiage
Feel free to elevate your kakiage experience with these delightful twists that cater to every palate!
- Dairy-Free: Substitute eggs with a flaxseed meal or chia seed mix to create a vegan-friendly batter. This makes it inclusive for those avoiding animal products while still keeping the texture light.
- Gluten-Free: Swap cake flour for a gluten-free all-purpose blend. This keeps the dish accessible for those with gluten sensitivities, ensuring everyone can partake in this crispy goodness.
- Herb-Infused: Add fresh herbs like cilantro, parsley, or chives to the vegetable mix for an aromatic boost. The herbs add a lovely vibrancy and freshness to each bite.
- Crispier Cornstarch: Enhance crispiness by increasing the amount of cornstarch in your batter. The added cornstarch creates an even more delicate and crunchy texture, perfect for those who appreciate a good crunch!
- Spicy Kick: For fans of heat, mix in a pinch of cayenne pepper or finely chopped jalapeños into the batter to give your kakiage an exciting, spicy edge.
- Seasonal Veggies: Experiment with seasonal vegetables! Try adding butternut squash in the fall or asparagus in spring for variations that celebrate what’s fresh and in season.
- Calamari Option: Substitute shrimp with calamari for a fantastic seafood twist. The tender rings lend a unique flavor while keeping things interesting.
- Cheesy Delight: Incorporate grated cheese, like Parmesan or cheddar, into the batter for a savory richness. This melt-in-your-mouth addition brings a whole new level of flavor and indulgence.
These variations not only allow for creativity but also ensure that every batch can be a new experience tailored just for you and your loved ones!

Crispy Authentic Kakiage Recipe FAQs
What are the best vegetables to use for kakiage?
Absolutely! You can use a variety of fresh vegetables for kakiage. Traditional options include onions, carrots, and green beans. However, feel free to mix in seasonal vegetables like zucchini, sweet potatoes, or even bell peppers. The more the merrier! Just make sure to prep them by slicing or julienning so they cook evenly in the batter.
How should I store leftover kakiage?
For optimum freshness, enjoy your crispy authentic kakiage within 2 hours. If you need to store leftovers, place them in an airtight container in the refrigerator for up to 3 days. When you’re ready to savor them again, reheat in the oven at 180°C (350°F) for about 10 minutes; this will help restore that crispy texture we all love!
Can I freeze kakiage for later?
Yes, you can! To freeze cooked kakiage, first, place them on a baking sheet in a single layer and freeze them until solid. Once frozen, transfer them to a freezer bag, where they’ll keep well for up to 1 month. When you’re ready to enjoy them, you can reheat directly from frozen in a preheated oven until they’re heated through and crispy—usually around 15-20 minutes.
What should I do if my batter is too thick?
If you find your batter is thicker than desired, don’t worry! Simply add chilled carbonated water a little at a time until you achieve a lighter, flowing consistency. This will help your kakiage come out crispier! It’s all about finding that perfect balance, so don’t hesitate to adjust as needed.
Is there a gluten-free option for kakiage?
Very much so! To make a gluten-free version of crispy authentic kakiage, substitute the cake flour with a gluten-free all-purpose blend. Many blends work well, but look for one that includes xanthan gum for improved binding. This way, everyone can enjoy the crunchy delight without worry!
Can I use this recipe for pets?
It’s best to keep kakiage for human enjoyment only. The ingredients like fried batter, salt, and any dipping sauces aren’t suitable for pets. However, you can set aside some plain, uncooked vegetables for your furry friends—they’ll appreciate the healthy treat!

Crispy Authentic Kakiage: The Best Veggie Tempura You’ll Love
Ingredients
Equipment
Method
- Chill the Ingredients: Combine cake flour and cornstarch in a bowl, then place it in the freezer for about 30 minutes.
- Prepare the Vegetables: Pat sliced onions, julienned carrots, halved green beans, and optional shrimp dry with a paper towel and lightly sprinkle with cake flour.
- Heat Oil: Preheat oil to 180°C (356°F) in a deep frying pan.
- Whisk Batter: In a bowl, whisk together the egg and chilled water until well blended.
- Combine Dry Ingredients: Gradually sift the chilled cake flour and cornstarch into the egg mixture; fold until combined.
- Incorporate Vegetables: Toss ice cubes into the batter and pour the mixture over the prepared vegetables; gently mix.
- Fry: Drop spoonfuls of the mixture into the hot oil, frying until golden brown and crispy.
- Drain: Transfer kakiage to a wire rack to let excess oil drain.
- Serve: Plate kakiage while hot, alongside a sprinkle of sea salt or a small bowl of tsuyu sauce for dipping.
Notes


Leave a Comment